Table of Contents
Publishing a blog post
- Click on Edit.
- Click on Your Blog Posts
- Click on Add New Post
- Write your blog post: title, text, images and click on Done
The blog post is created and will be displayed on your blog.
Scheduling a post
The default date of the post will be the day you publish your blog post. If you want to schedule a post to be published later:
- Click on Edit.
- Click on Your Blog Posts
- Click on Add New Post
- Write your blog post: title, text, images.
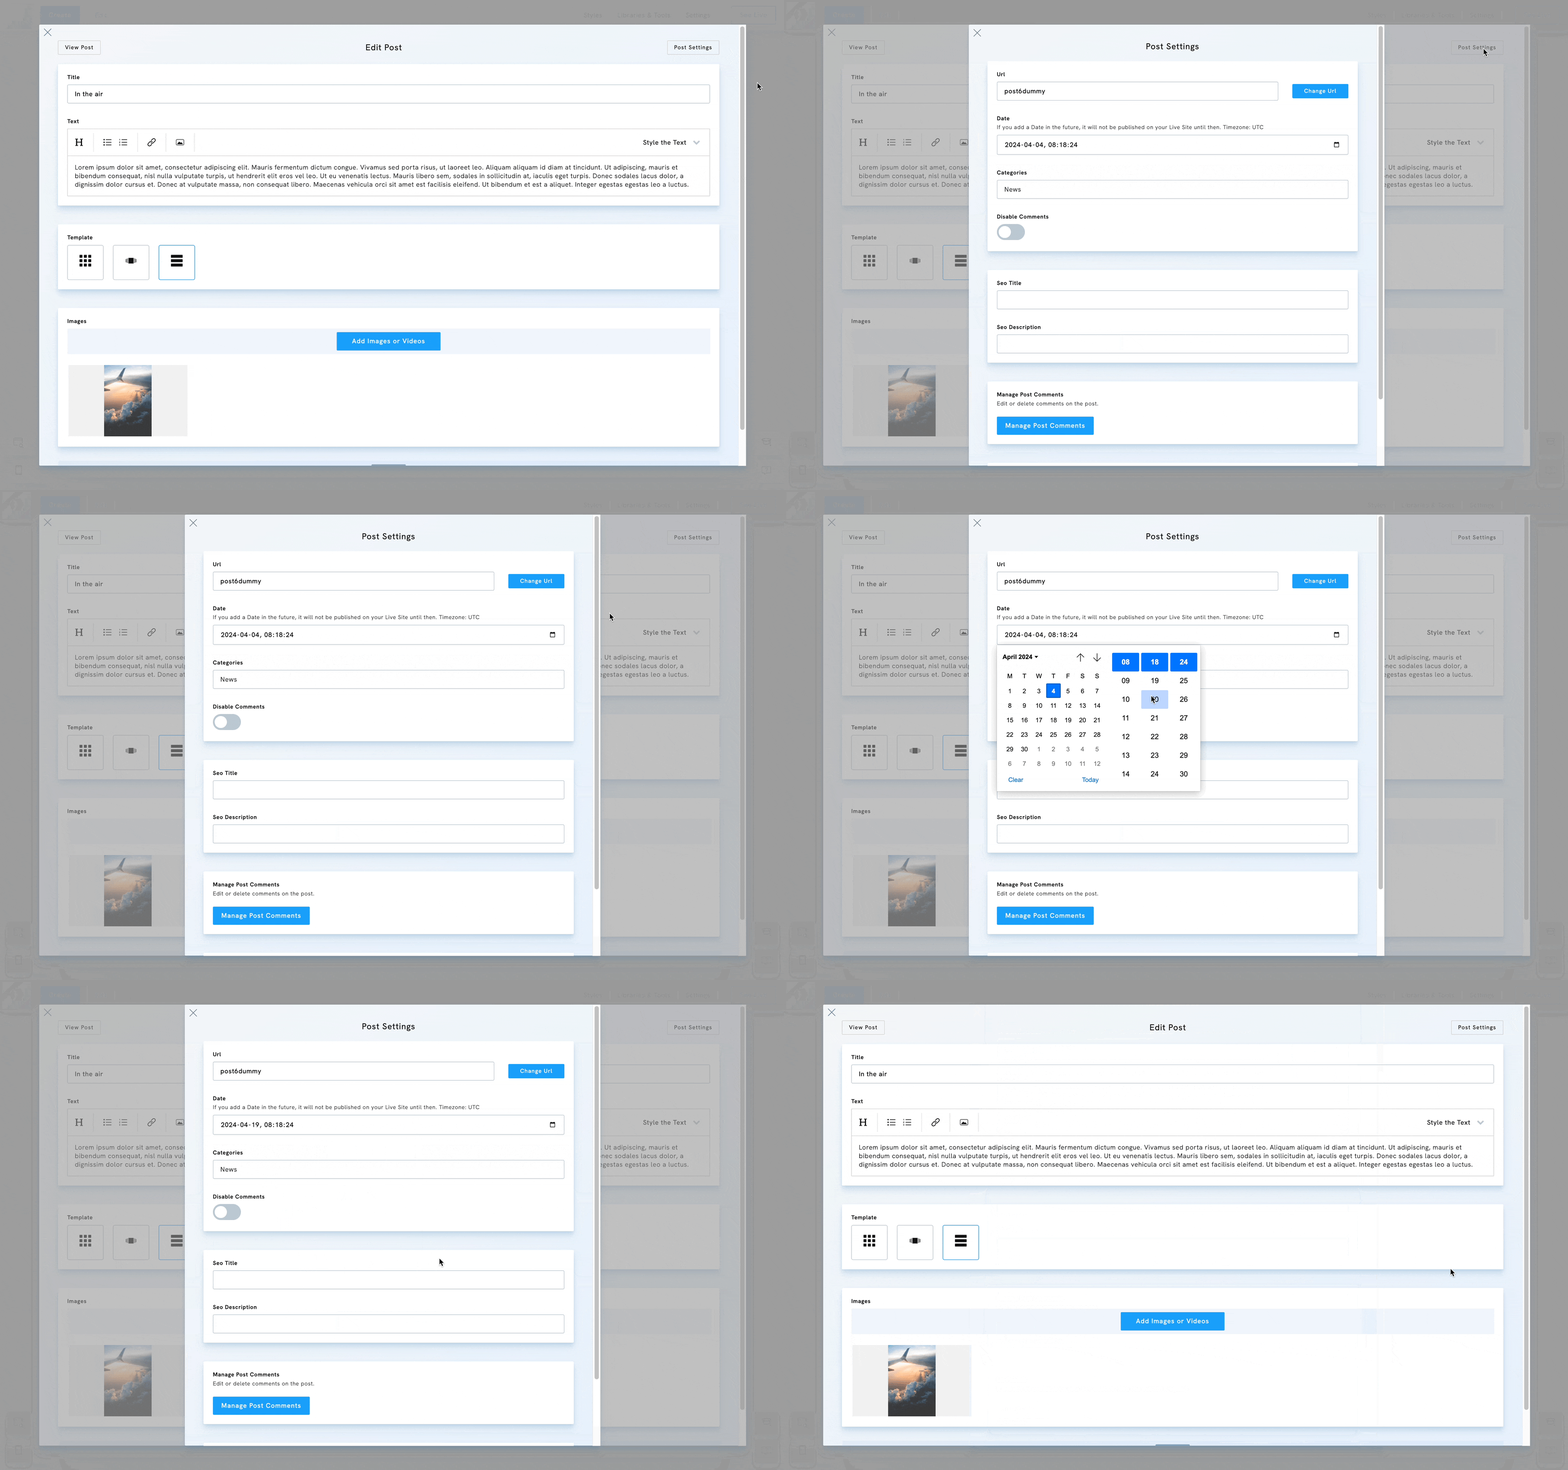
- Click Post Settings in the edit window's top-right corner.
- Click on the calendar icon near the Date field
- Select a date and time in the future.
- Close the blog post settings and click Done to save your post.
Once you've scheduled your post, it will be automatically published on the selected date and time. This feature eliminates the need for manual publishing, ensuring your post goes live when you want it to.
